LOW WASTE. HIGH STANDARDS.
Candle Care 101: How to Burn Your Candles the Right Way for a Longer, Cleaner Burn
Yes, There Is a Right Way to Burn a Candle
There’s something deeply satisfying about lighting a fresh candle—the instant ambiance, the cozy glow, the promise of hours of warmth. But if you’ve ever ended up with a tunnel of wasted wax, an off-center wick, or black soot coating your walls, you know that things can go sideways fast. Before leaving your favorite chandler (that's fancy for "candlemaker") a scathing review, read this article to be sure you're holding up your end of the bargain.
Here’s the deal: a perfectly burning candle—the kind that leaves nothing behind in the vessel—is about 56% how it’s made and 44% how it’s burned (numbers based on a rough estimation of my overall experience/research... and vibes). Even the best-quality candles can be ruined by poor burning habits. So, if you want to get the most out of your candles (and your money), follow these simple but crucial candle care tips.
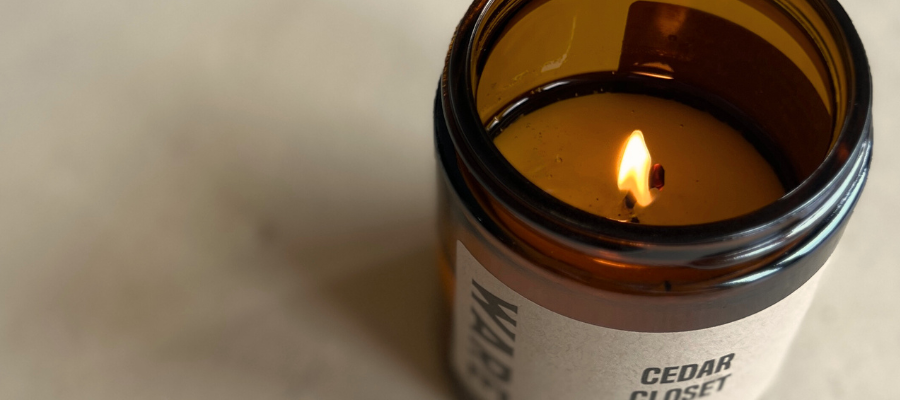
1. The First Burn Is Everything
Our candles come with a little info sheet that is starts, "The first burn is the deepest." That first burn sets the stage for how your candle will perform for the rest of its life. Wax has a memory (yes, really), and if you only let the melt pool reach halfway across before blowing it out, your candle is now programmed to tunnel.
✔ Burn until the entire surface melts evenly and the top 1/2 inch of the candle is liquid—this can take 2-3 hours, depending on the size of the candle.
🚫 Don’t rush it—short burns that don't make it to the edges or deep enough often create a tunnel that deepens with every future burn.
2. Keep Your Wick in Check
A well-trimmed wick is the key to a steady, clean burn. Too long, and your flame will flicker, smoke, and burn too hot. Too short, and it might drown in its own wax.
✔ Trim to 1/4 inch before each burn to prevent excess soot and uneven melting.
✔ For wooden wicks, trim to about 1/8 inch and keep the burnt edges clean.
🚫 Don’t let the wick mushroom—those little carbon caps need to go before relighting.
3. Placement Matters
Where your candle sits can affect how it burns. Drafts from windows, fans, or air vents can cause uneven burning, excessive flickering, and sooting.
✔ Place candles on a flat, heat-resistant surface away from drafts.
🚫 Don’t burn too close to walls or shelves—soot buildup isn’t cute. I've had walls that had to be painted over, because I couldn't get it off with even my best tricks.
4. Burn Time: Not Too Short, Not Too Long
✔ Aim for 1-4 hours per burn. Short burns cause tunneling, but burning for too long overheats the wax and wick, reducing your candle’s lifespan.
🚫 Never burn a candle for more than 4 hours at a time—it can cause the wick to become unstable and lead to excess soot and smoke.
5. Extinguish with Care
Blowing out a candle can send wax splattering and cause excess smoke. Instead:
✔ Use a candle snuffer for a clean, smoke-free extinguish.
✔ Dip the wick into the melted wax using a wick dipper to instantly snuff the flame and re-coat the wick for the next burn.
🚫 Don’t put the lid on while the flame is still burning—the trapped smoke can alter the candle’s scent and turn the wax grey.
6. Stop Before the Bottom
You might want to burn your candle all the way down, but resist the urge.
✔ Stop when about 1/2 inch of wax remains to prevent overheating and glass breakage.
🚫 Never burn a candle to the very bottom—the heat at the base can cause glass vessels to crack or shatter.
7. Store Your Candles Like You Care
✔ Keep candles in a cool, dry place away from direct sunlight to prevent fading, softening, or scent loss. This is particularly important for candles scented with essential oils. We make most of ours in amber jars, to help protect from sunlight, but every effort helps.
🚫 Don’t store them near heat sources—melted candles are a tragedy.
Bonus: How to Fix a Tunneling Candle
Already messed up? No judgment. You can try the "foil method" to even out a tunneled candle:
1️⃣ Wrap aluminum foil around the top of the candle, leaving an opening for the flame.
2️⃣ Let it burn for an hour or so—the foil traps heat and helps melt the wax evenly.
3️⃣ Remove the foil once the wax pool is even, and promise to treat your candles better next time.
The Takeaway
Candles might seem like a light-it-and-forget-it situation, but a little maintenance goes a long way. Treat them right, and they’ll burn evenly, last longer, and keep your space glowing—without wasting wax or leaving you with a sooty mess.
Now, go burn one down! ;)
Leave a comment